Tuesday, December 8, 2015

Terrifically Tuesday

Happy Day all!  This is going to be super quick today!  Busy day here at the Arkfeld house - Feast of the Immaculate Conception Mass with 22 Kindergartners!!!  Plus about 10 5th Graders.  Then took them all to the nursing home to sing to the group there.  

Now off to take the oldest to basketball practice.....  Drive, drive, drive!  

Anyway - here are this week's Weekly Deals: 


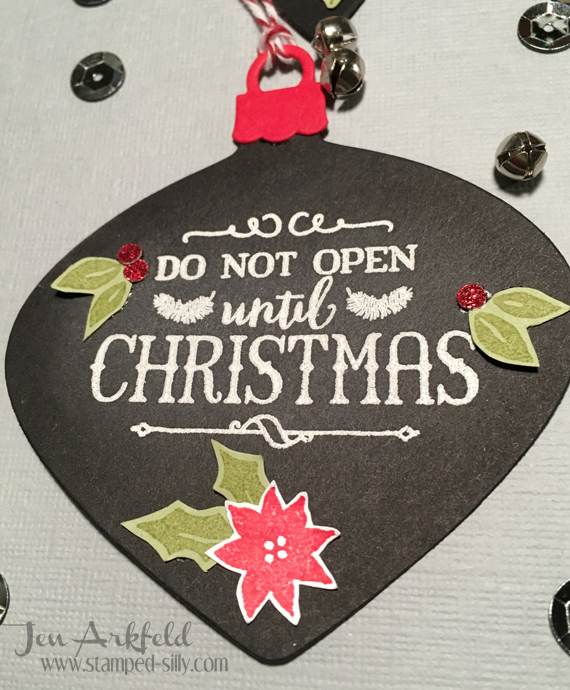
And here's a quick - and CUTE - project for you:


There's not a lot to go into with this one - I simply used the pillow box die, stamped the snowflakes from Holly Jolly Christmas, added a strip of music notes dsp, wrapped some ribbon on it.  Then topped it off with that favorite little deer of mine and the sentiment.  These are great for gift cards - or candies.....you name it!

Alright - off I go! That's it for today....

post signature

Monday, December 7, 2015

Berry Basket - not just for Berries!


Hello there!  Something a little different on the blog today~!  YAY!

However....IF I can get thru this post without falling asleep is going to be nothing short of a miracle!  No joke.  I've fallen asleep 4 times while editing my photos!  In just a half and hour! 

I have a serious sleep issue.  I can tell the time by it.  At 9:15 every night, my restless leg starts to act up and then I get super sleepy.  Sleepy enough that no matter what I do - I'll fall asleep while doing it!  Most of the time I cave and just go to bed.  But I've been trying to break the habit.....so, I'm trying to work thru it.   "It's" winning!

Alright - let's get on with the show!


Let me tell you how these little baskets came to be...My sister in law is a teacher and is always wanting cute little gifts to give her aides and teacher friends.  This is what I came up with for some of her little gifts.  

I just love that poinsettia on the front of the basket.  And this time of year Pool Party and Real Red are some of my go to colors!  They just work so darn well together!

Before you jump into creating these ADORABLE Berry Baskets, let me give you a couple of tips.

1) Cut your berry basket from Whisper White Thick Cardstock, AND the color that you want the basket to be. I did this to help make the basket more sturdy - and it REALLY does make all the difference in the world. Use the white thick one on the inside, and the colored one on the outside.
2) Since you've cut the Die at least twice with the Thick Card Stock, be sure to use the Thick Cardstock as the portion that goes around the top of the basket.

*****THIS PROGRAM HAS BEEN TEMPORARILY INTERRUPTED - BY SLEEP! *****

So there you have it - I couldn't make it any longer, and officially fell asleep.  Good news tho - I'm back at it this morning - with coffee in hand.  Maybe I need to up my coffee game - I just drink half caff these days - maybe I should go all out!

Anyway - as I was saying before being so rudely interrupted - 

I've created this box using two thicknesses of cardstock.  You'd be amazed at how much sturdier they are when you line the inside with the Thick Whisper White Card Stock.  

It's sturdy enough now that I've got 4 packets of cocoa in there - 2 Starbucks and 2 Ghiradelli (which btw - are thick and loaded! and heavy!)  I've also included a couple of candy canes - I've forgotten the marshmallows - but will go back and add them in a little mini cello.

I really think this will make an adorable gift for teachers, neighbors, friends, Secret Santa, etc.  Those people that you need to let know they are special to you. 


Here's a close up of the tag - It's a copy from yesterday's card.  I just changed it up a little bit!

Oh - and the cello bag.  I tried and tried AND TRIED to use the Stampin' Up! ones, but I just couldn't get them to work right.  They aren't wide enough.  So, my mom came to the rescue.  She's also a curator of creative gifts and had plenty of bigger cello bags on hand.  I had to create a flat bottom in them, using some of the white cardboard that comes in our Designer Series paper as the bottom to keep it's shape - but it worked well.  I could almost make a wider basket to fit in these bags.  


Product List
post signature

Sunday, December 6, 2015

Creation Station: It's Christmas Time!


Good Morning!  Welcome to our December Blog Hop - this month we are focusing on the Holidays!  We'll be highlighting projects created with the Peaceful Pines Bundle and the Embellished Ornaments Bundle.  

I've decided to use the Embellished Ornaments bundle today.....but, here's the scoop.  I've only used the Delicate Ornaments Thinlits.  What I love about this bundle is that the Thinlits work SO well on their own - you don't HAVE to use the stamp set.  Here's my first project - a set of gift tags:


I've paired these ornaments up with two other stamp sets - Oh What Fun and Berry Merry.  I really like all of the fun building elements in Berry Merry.  So, I mounted several of them onto a block and stamped them a bunch of times.  Then....sat with a good tv show and fussy cut them out!  I really don't mind fussy cutting - it's like therapy.  

Here are some close ups of all of the tags:


One more project I created:

Once again - I die cut just the ornaments.  The Pool Party ornament I backed with a plain White one, otherwise, it was going to be too busy with the green one showing thru the back.  


I used the Merry from the Christmas Greetings Thinlits, with the coordinating Holly Jolly Greeting Stamp Set for the Christmas portion.  That is simply heat embossed in white on black.  I feel like this combo really draws your eye to the focal point.  

 Once again, I used the little bits from the Berry Merry set - I had PLENTY leftovers from the tags!
This is all placed on a card front that's got a panel from the Winter Wonderland Vellum Stack. I love the snowflake look in gold!   

Well - I hope you've been inspired a little - be prepared to be even more inspired as you travel around the Creation Station using the buttons below!


Ornament Tag Supply List
Product List


Ornament Card Supply List


Product List
post signature